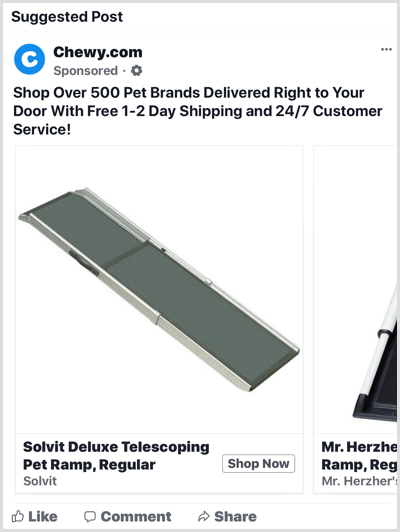
What Are Dynamic Product Ads?
Dynamic product ads let you target customers who have visited your website and browsed a range of your products but left before completing the purchase. This is a very hot audience so it’s important to target them to encourage them to convert.
With dynamic product ads, you can create a tailor-made ad for each person with the products they’ve viewed on your website and a range of other products. They’ll see these ads on their Facebook and Instagram feeds the next time they log in.
The benefit of dynamic product ads is that you minimize the number of conversions lost at the last stage of the sales process. The ads remind customers of your products and increase the likelihood of a website visitor returning to your website to buy something. You can also spotlight offers, show product reviews, and tell users about delivery time or other key points.
Remember, these ads will likely be the most profitable Facebook ads you run, so it’s important you set them up correctly. By following these steps, you can get your own dynamic product ads up and running in no time.
#1: Set Up Facebook Pixel Events
The Facebook pixel helps ensure your dynamic product ads campaign serves up the right ads to the right audience at the right time. It’s a snippet of code that sits on your website and tracks the events (different actions) people take on your website. It’s important to set up the pixel and ensure it’s tracking correctly. If not, you won’t be able to get your dynamic ads to work properly.
Three Facebook pixel events are important for dynamic ads: Purchase, Add to Cart, and View Content.
![]()
After you install pixel event codes on your site, you can check that the events are firing correctly by using a free Chrome browser plugin called Facebook Pixel Helper. After you install the plugin, a little pixel logo icon appears in your browser toolbar. All you need to do is visit the web page you want to check, click the Facebook Pixel Helper icon, and you can see what events are firing on that page.
Tip: Remember to disable your ad blocker when using this plugin. Otherwise, it may appear as though your pixels aren’t working.
Below is an example of what you might see on an Add to Cart page. The green checkmark indicates the pixel is firing correctly, which is great. If you expand the AddToCart field, you can see more information your website is passing on to Facebook to get your dynamic product ads working correctly.
![]()
#2: Create a Product Feed
A product feed is essentially a page hosted on your website that contains all of the information Facebook needs to know about your products. This information might include:
- Product descriptions
- Number of products in stock
- Sizes in stock
- Condition
- Price
- Image link
- Shipping
Providing information about your products allows Facebook to dynamically fill your ads with this information when people view the products on your website. It’s very clever.
You can create a product feed in lots of different ways. The right method for you depends on what system your website is made from and what plugin you need to use to create the feed. Here’s a breakdown of the most common ecommerce platforms and the plugins you need to use for each of them.
Shopify
Imagine keeping up with important trends & knowing exactly how to successfully implement the latest techniques. ☝️
If you have a Shopify store, you have two plugin options.
Facebook Product Feed by Flexify is free and works well for any ecommerce store with fewer than 100 products. You just need to install the plugin into your Shopify store, and then presto! Your feed can be created.

If you have more than 100 products, Flexify can get a little buggy, so you’re better off switching to Pixel Perfect (which costs $14.99 per month). Both apps do basically the same thing, but Pixel Perfect is more reliable for bigger stores.
![]()
WooCommerce
If you have a WordPress store (WooCommerce), PixelYourSite is a great option to set up the pixel and event tracking. You need to get the Pro version when you install the plugin. It costs $80 per year, but it’s well worth it.
Once you have PixelYourSite Pro installed, you need the Pro version of PixelYourSite Product Catalog Feed, which costs $50 per year. Both PixelYourSite Pro and PixelYourSite Product Catalog Pro work together to provide everything you need to get up and running.
Other Ecommerce Setups
If you have a bespoke ecommerce platform rather than an off-the-shelf system, you have a couple of options:
- Speak to your developers and ask them to build a product feed for your website. They can get all of the technical information they need from Facebook here.
- Build a manual feed. A manual feed is an Excel document that contains all of the product information that Facebook needs. You then upload it to Facebook Business Manager. Manual feeds are great for smaller ecommerce stores that struggle to get product feeds built, but a drawback is that they don’t get updated when the website gets updated.
If you want to download the template for a manual feed, click the link above. There are several options depending on what format you want to use:
Product Feed Link
When your product feed is complete (except for the manual feed), you’ll receive a link that looks something like this: www.yourwebsite.com/feed/my_product_feed.txt. Later, you’ll add this link to Facebook Business Manager so Facebook can pull the data from the feed into the system.
#3: Set Up a Facebook Catalog
The next step is to create a Facebook catalog that contains information for the items you want to advertise in your Facebook ads. The catalog can be used not only for dynamic product ads but also for carousel ads, collection ads, or any ads where you want to display your products.
What are the benefits of a Facebook catalog?
- It will keep track of the products you sell so you can use them seamlessly with your ads.
- It allows you to serve targeted ads to people who’ve already shown interest in your business through dynamic ads.
- You can show off your inventory to people in a full-screen experience on mobile (collection ads).
Create the Catalog
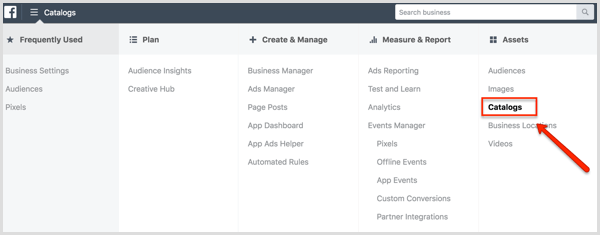
To create a catalog, open Facebook Business Manager, click the three lines in the top left to open the menu, and select Catalogs under Assets.
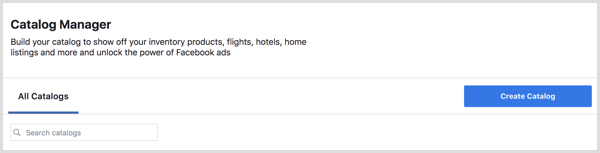
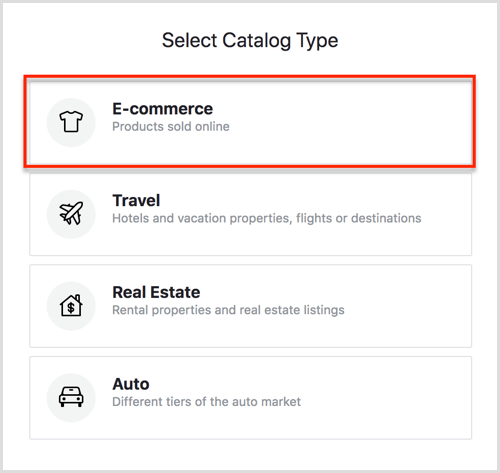
On the Catalog Manager page, click Create Catalog.
Select the relevant catalog type and click Next. In this example, select E-commerce.
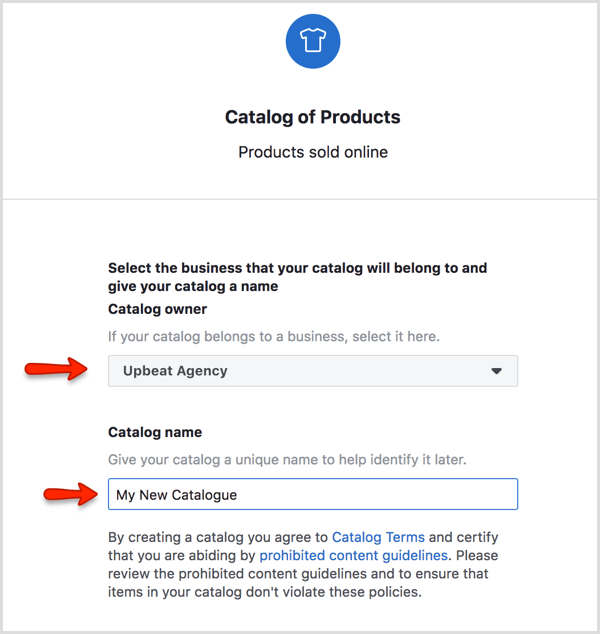
On the next screen, select your business name from the drop-down menu, add a name for your catalog, and click Create.
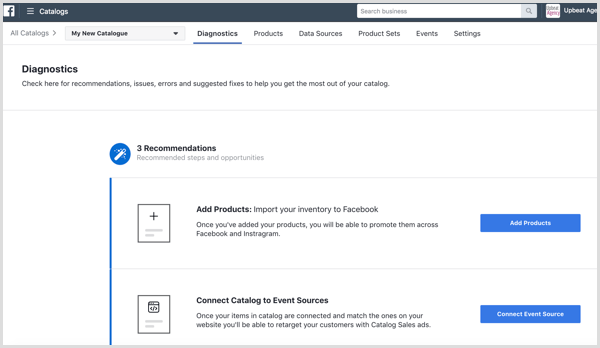
You then see a message that your catalog has been created. Click View Catalog to open the Catalog Manager homepage, which looks like this.
Set Up Product Feed
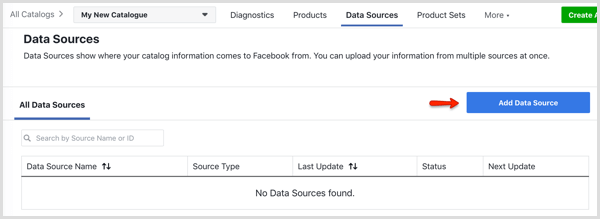
The next step is to set up your product feed. Open the Data Sources tab at the top of the page and click the Add Data Source button on the right-hand side.
On the next page, select the Set a Schedule option. This means your feed will automatically update at a time and frequency you choose, which is important if your stock changes regularly.
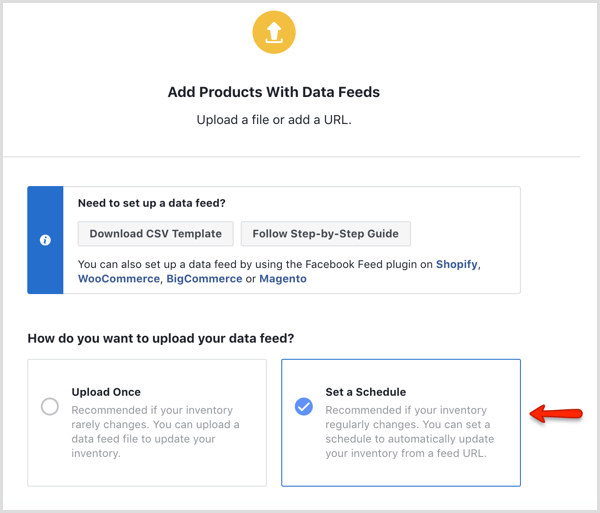
Scroll down to the Add a Data Feed URL section and paste your product feed URL in the box. (This is the URL you set up earlier.) Unless your feed is password-protected, you don’t need to enter those details.
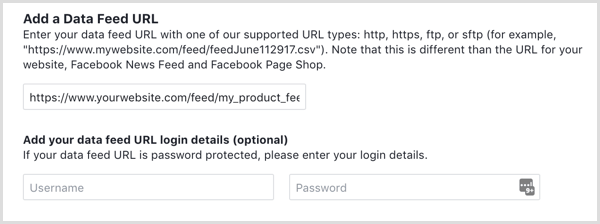
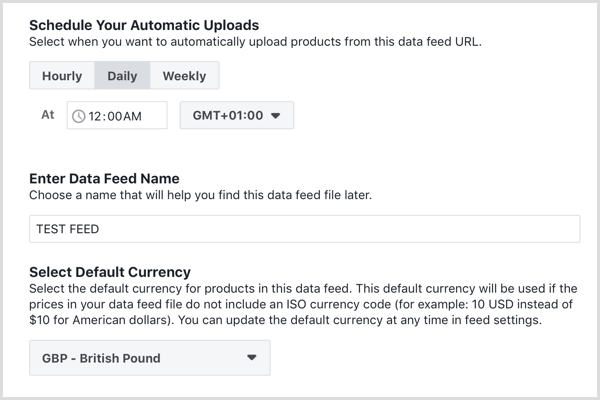
Next, decide how often you want your feed to update. For instance, you can schedule it to update every day at midnight.
Finally, enter your feed name and select the correct currency. When you’re done, click Upload.
It may take some time for your feed to upload depending how many products you have in it. After you see a message that the upload is complete, click Done to return to the Diagnostics page, where you can troubleshoot any issues with your feed.
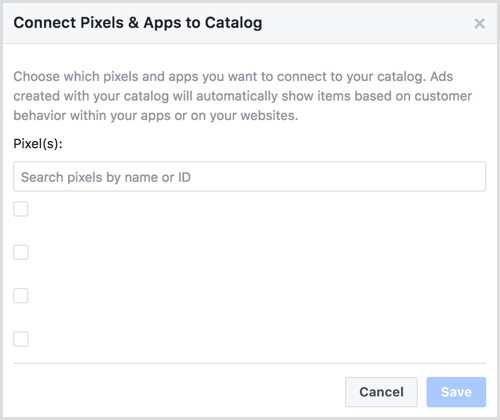
Connect an Event Source
Now you need to connect an event source, which basically means telling the catalog which Facebook pixel to use. This is an important step and shouldn’t be overlooked.
Click the Connect Event Source button.
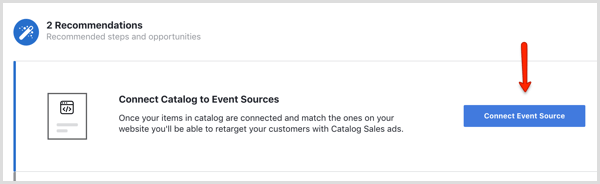
In the pop-up window, select the appropriate Facebook pixel for the project you’re working on.
Now that you have the product catalog up and running, you can move on to build your campaign.
#4: Set Up Your Facebook Dynamic Product Ads Campaign
To create your campaign, open Ads Manager and click Create.
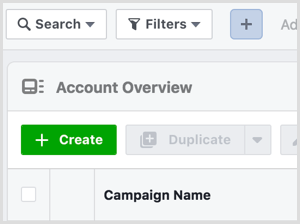
On the next page, click Select Quick Creation.
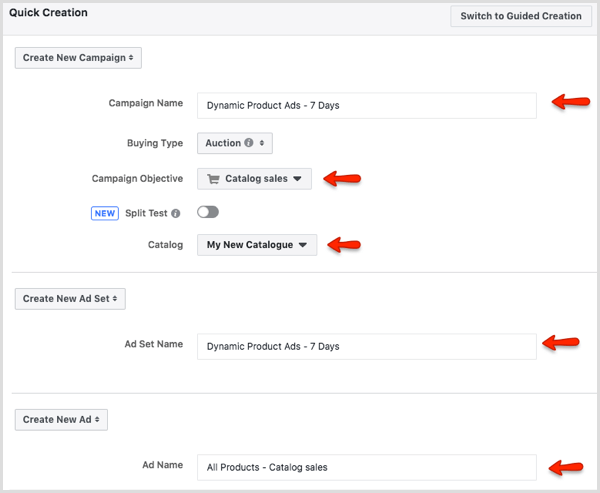
When the parameters window opens, name your campaign and select Auction as the buying type. Choose Catalog Sales as the campaign objective and choose the catalog you want to promote.
After you name your ad set and ad, click Save to Draft.
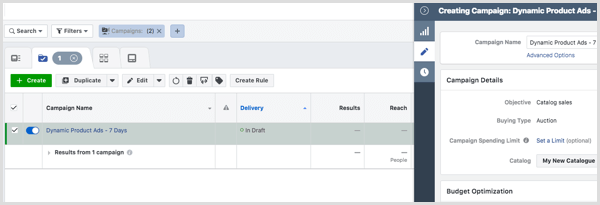
Once you click Save to Draft, the campaign shell is added to your Ads Manager, as shown here:
At this point, it’s a good idea to change the budget optimization. Turn on the Budget Optimization slider.
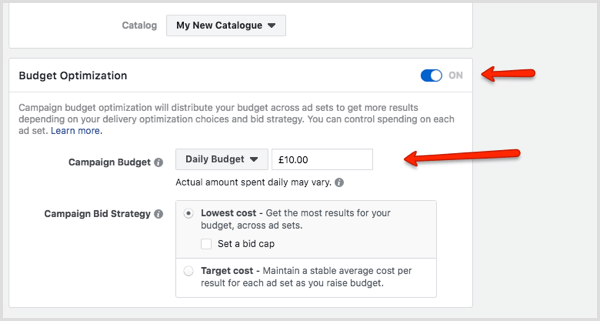
Now set your campaign budget. If you’re not sure what budget to set, around $14 (£10) a day is a good place to start, unless your website is receiving thousands of website visitors daily. In this case, your audience size would be bigger so you’d need to increase the budget to ensure you reach as many of these people as possible.
When you’re done, click the small arrow at the top right and select Close in the pop-up window to return to the main Ads Manager screen.
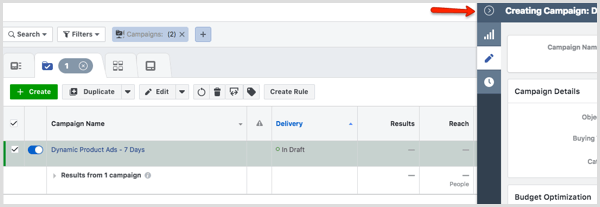
Now that you’ve edited the campaign section, you’re ready to set up the Ad Set level. Click the Ad Sets tab.
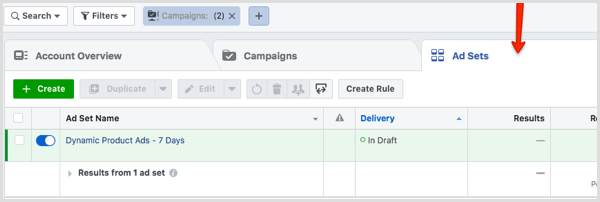
Then select the checkbox next to the Ad Set name and click the pencil icon on the right. The screen will slide out and you’ll be able to see the audience options section.
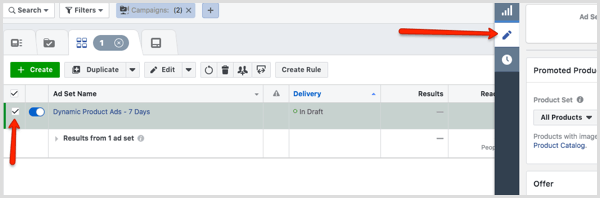
At the Ad Set level, select the products you wish to promote and set your budget and scheduling.
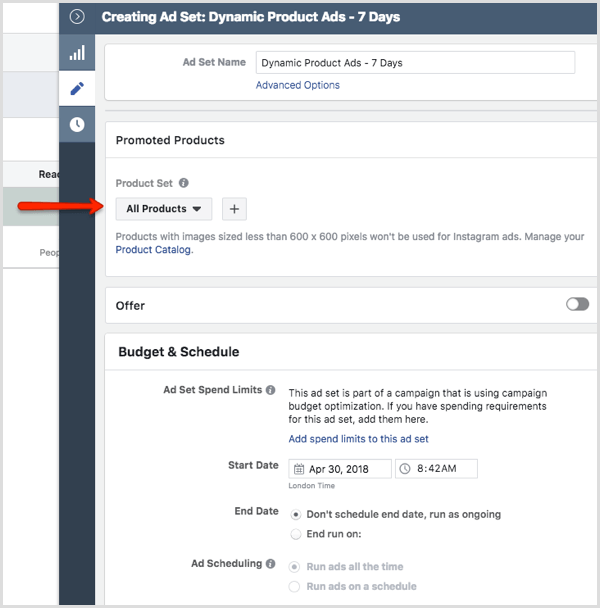
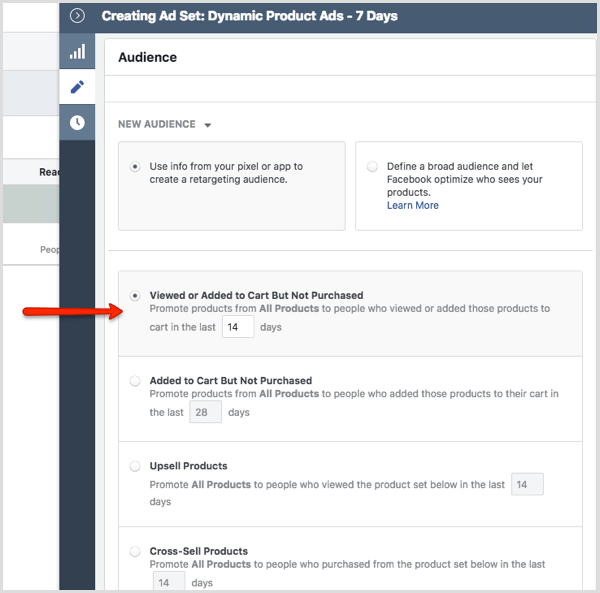
Scroll down the Audience section. When you first get started with dynamic product ads, you may want to select Viewed or Added to Cart But Not Purchased.
If you have lots of traffic coming to your website, you may want to test different options and have different messages serve different audiences depending on what events they trigger.
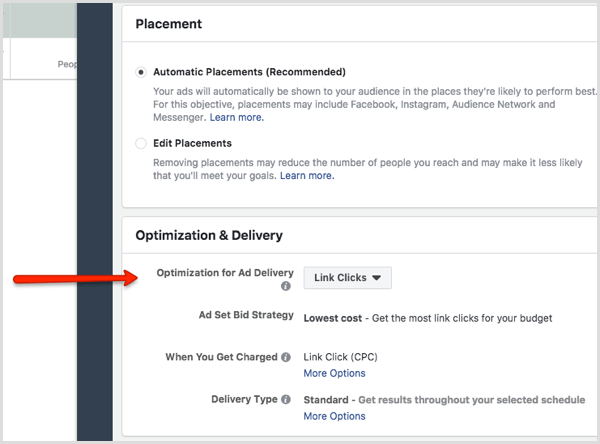
Under Placement, select Automatic Placements. For Optimization & Delivery, again it’s worth testing different options, but to get started, select Link Clicks.
Now you’re ready to create some ads. Click the little gray arrow and click Close in the pop-up.
Next, click the Ads tab.

Select the ad name checkbox and click the pencil icon on the right-hand side to display the ad options.
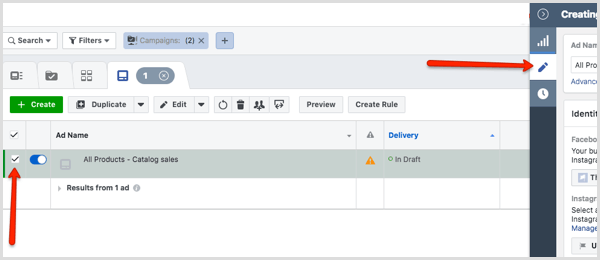
At the Ad level, first select your Facebook page. If you’re going to show the ads on Instagram, select your Instagram account. Under Creative, select Ad With Multiple Images in a Carousel.
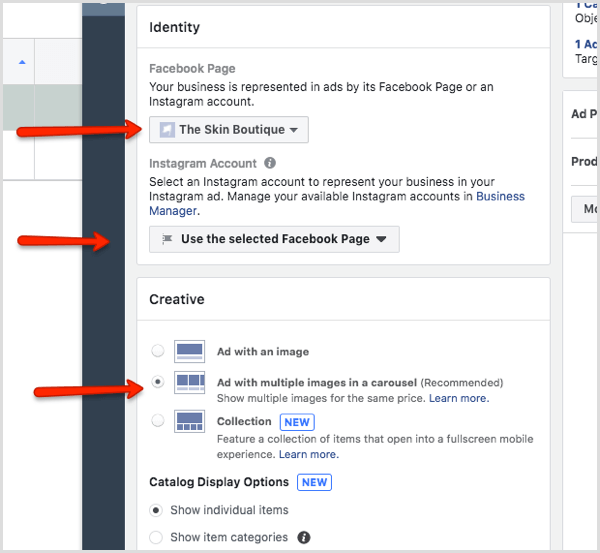
When you create a dynamic ad, the product images will be automatically pulled from your website and you can choose exactly what information about the product you’d like to show in your ads.
As you scroll down, you see a number of options for customizing your ad. This is where you can add text to your ad, select what information you want to pull from your dynamic feed, and choose your call-to-action button. You may want to test a few different things to see what works for your business and audience.
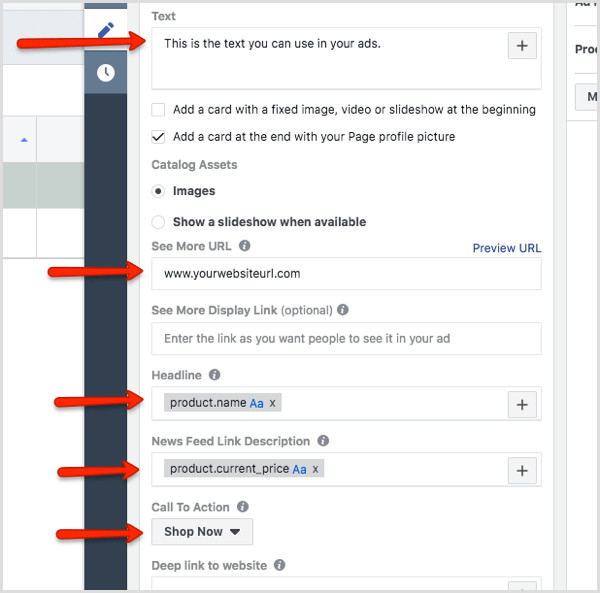
When targeting people who have viewed particular products on your website, carousel ads are the recommended format because they showcase all of the products that person has previously viewed on your website.
Depending on your products, it may also be worth testing single image ads vs. carousels to see what works best for your brand. I suggest using more aggressive copy here than in previous steps to remind your target audience that the products they viewed previously are still available.
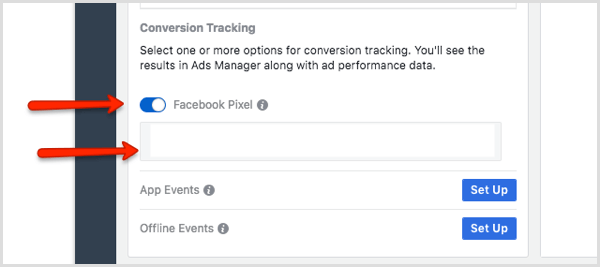
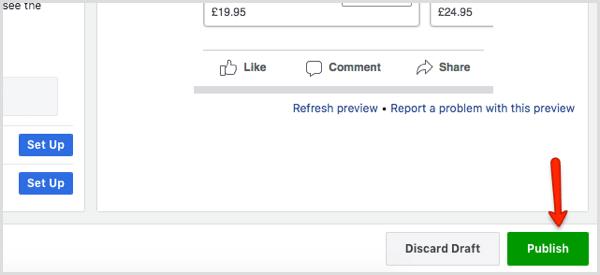
Scroll down and make sure you have your Facebook pixel selected.
When you’re ready, click Publish.
Your ads will now go into review, but should be published shortly.
Conclusion
And there you have it! Your first dynamic product ad campaign is complete. As you’ve seen, Facebook offers lots of different options to give you the best chance of success on their platform. This guide works well for an ecommerce business, but depending on your market, products, and target audience, you may find slight variations of these recommendations are more appropriate for your business.
I recommend getting your dynamic product ads up and running for a week so you can get some data into the ad account. Then test some new options with a fresh campaign to see what works best.
What do you think? Have you used dynamic product ads? Were you happy with the results?
Let us know ifi you have any questions – Joe
